Dog Care
Senior Dog Mobility: Beds, Ramps and Supportive Gear
Quick answer
Choose supportive beds, safer ramps, traction surfaces and mobility harnesses for an older dog while keeping veterinary assessment central to the plan.
By ShineePets Editorial Team · Published · Updated
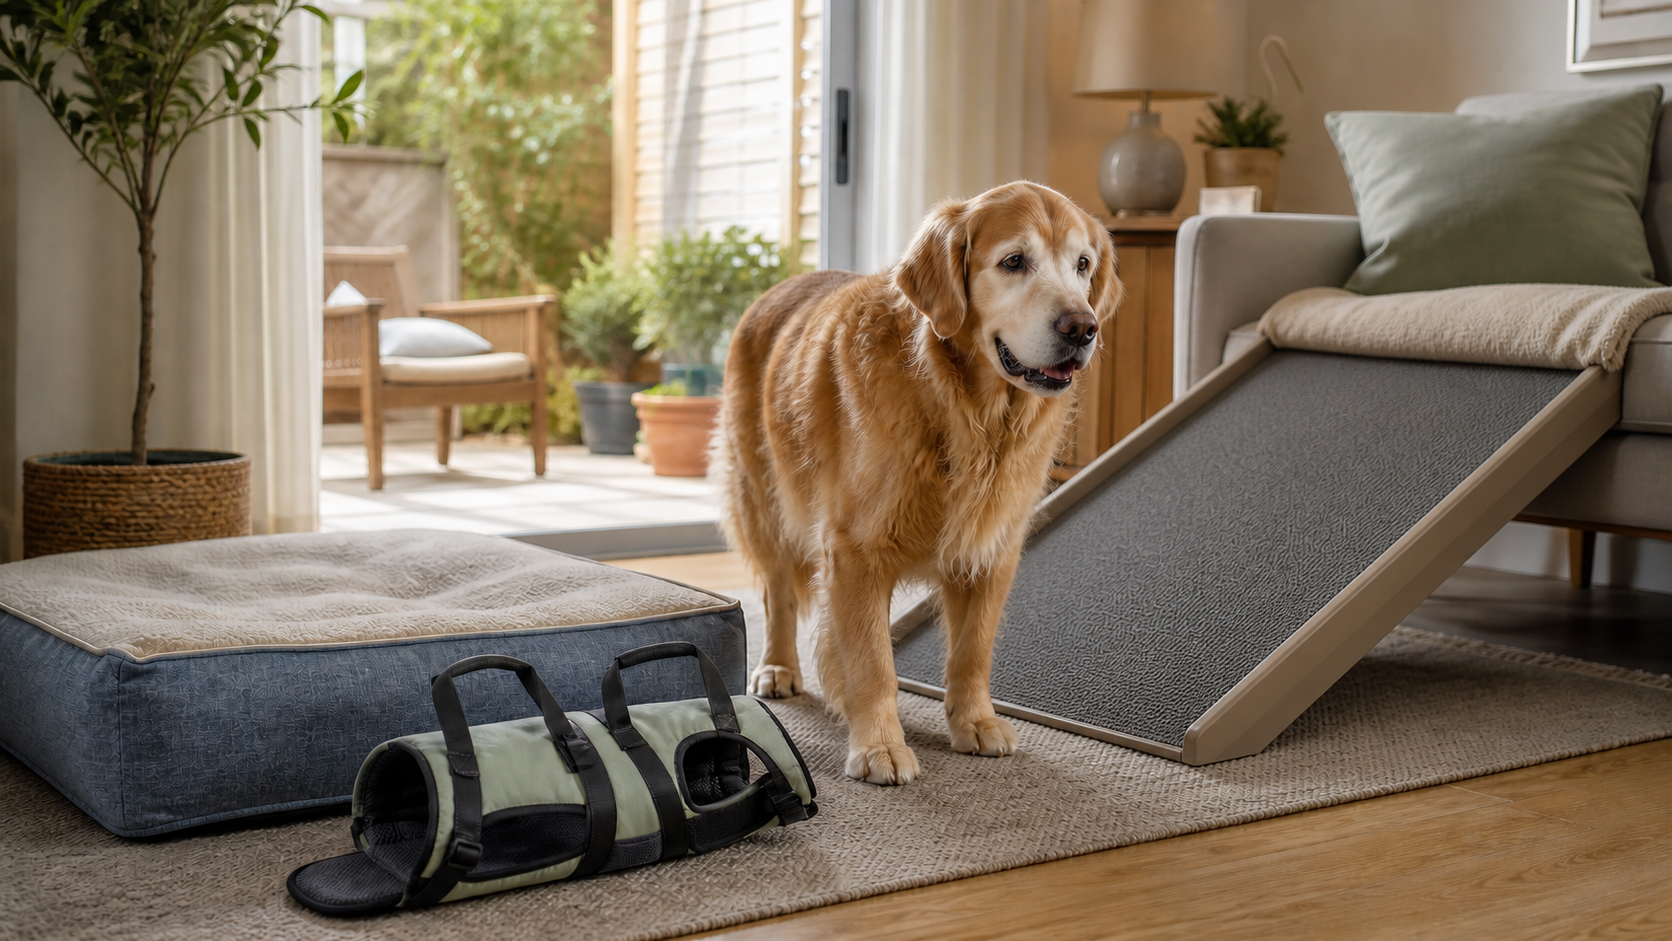
When an older dog starts hesitating at stairs, slipping on hard floors or struggling to rise, the right home setup can protect confidence as well as comfort. A supportive bed, a stable ramp and a well-fitted assistance harness may reduce unnecessary effort—but each item must match the dog’s body, diagnosis and actual movement pattern.
Mobility gear is not a substitute for pain assessment or veterinary treatment. Its job is to make daily activities safer while the veterinary team addresses the reason mobility has changed.
Start with the route, not the product: Observe where your dog loses traction, pauses, shifts weight or needs help. Fix those specific moments before buying a collection of devices.
New Mobility Changes Need Veterinary Attention
“Slowing down” can reflect osteoarthritis, but it can also result from a muscle, tendon, spinal, neurologic, cardiac or systemic problem. Cornell University notes that canine osteoarthritis is diagnosed through a veterinary examination that evaluates gait, posture, joints and pain, with imaging used when appropriate.
Arrange a veterinary assessment for changes such as:
- stiffness after rest or reduced willingness to walk;
- difficulty rising, sitting, lying down or finding a comfortable position;
- reluctance to use stairs, jump into a car or step over a threshold;
- limping, shortened steps, scuffing nails or wearing the tops of the paws;
- slipping, crossing the legs, knuckling or dragging a foot;
- panting, trembling, irritability or guarding when touched;
- reduced interest in play, walks or family activity;
- toilet accidents that occur because the dog cannot reach the usual area.
Seek urgent veterinary care for sudden inability to stand or walk, collapse, severe pain, significant trauma, loss of bladder or bowel control, breathing difficulty, a cold or visibly injured limb, or rapidly worsening weakness. Do not test a new ramp or exercise program when the dog is acutely unstable.
Short videos of rising, walking, turning, using steps and getting into the car can help the veterinary team see movements that may not appear in the clinic. Film on a non-slip surface and never provoke a painful activity solely to record it.
Map the Dog’s Daily Mobility Tasks
Walk through a normal day from the dog’s point of view. List every transition:
1. Getting up from the bed.
2. Crossing the bedroom or living room floor.
3. Reaching water, food and the toilet area.
4. Going through doorways and over thresholds.
5. Entering the yard, navigating steps or crossing a curb.
6. Getting into the car for veterinary visits.
7. Reaching any sofa or sleeping place the household still permits.
Note the surface, height, available space and direction of travel at each point. The most useful purchase is often not a specialized device but a connected path of secure runners between essential areas.
Create a Continuous Non-Slip Route
Traction is the foundation of a mobility-friendly home. A dog that braces against slipping may move stiffly, avoid an area or fall during a turn. AAHA senior-care guidance recommends rugs or similar surfaces for better footing and emphasizes identifying home hazards.
Use low-pile runners, secured rugs or washable traction mats to connect the bed, food, water, exits and family areas. An isolated mat helps only until the dog steps off it. Choose surfaces that lie flat, resist bunching and remain grippy when paws are wet.
Pay special attention to:
- the first step after getting out of bed;
- corners and turning areas;
- the space beside food and water bowls;
- the landing at both ends of a ramp;
- door thresholds and patio transitions;
- the route from the door to the toilet area.
Clean spills promptly. Keep nails and paw hair at an appropriate length with veterinary or grooming guidance. If paw sensitivity, wounds or an abnormal nail-wear pattern appear, ask the veterinarian before adding footwear.
Choosing a Supportive Senior Dog Bed
A mobility bed should support rest and make position changes manageable. “Orthopedic” is not a regulated guarantee of performance, so evaluate the construction instead of relying on the label.
Support and firmness
The surface should distribute weight without allowing the heaviest points to sink to the floor. Very soft fill can be difficult to push out of; very hard surfaces may be uncomfortable over bony areas. Look for a stable foam core that recovers its shape and supports the whole body.
Entry height
Choose a low, unobstructed entrance. A thick bed with tall bolsters on every side may require a painful step. A partial bolster can provide head support while leaving a wide entry.
Size and position changes
The dog should be able to lie in a preferred posture and turn without falling off. Measure the dog while resting naturally and compare that measurement with the usable sleeping surface, not the bed’s outside dimensions.
Cover and hygiene
A removable, washable cover and a moisture-resistant inner liner make care easier. The surface should provide grip when the dog stands. Avoid loose blankets that twist around the legs; tuck or secure layers when extra warmth is needed.
Placement
Put a bed on the main living level and near the family without blocking a walkway. Some dogs benefit from a second bed near the door or in the bedroom so they do not need to use stairs to stay close to people.
Heated products require special caution. Use only devices intended for pets, follow their instructions, inspect cords and surfaces, and ensure the dog can move away from the heat. Never substitute an unattended human heating pad.
Ramps: Fit the Space and the Dog
A ramp can reduce jumping, but a poorly fitted ramp creates a new obstacle. The safe configuration depends on the dog’s size, strength, balance, diagnosis, confidence and the height being reached.
Evaluate these features:
- Gentle slope: More horizontal space allows a lower incline. Do not choose an angle from a generic chart without considering the dog and setting.
- Usable width: The dog should walk without placing paws on the edge, even during a small sideways correction.
- Traction: The surface must remain grippy in both directions and in expected weather conditions.
- Side guidance: Raised edges can help prevent a paw from stepping off, but they must not reduce the usable width too much.
- Stable attachment: The top should lock or brace securely against the destination. The ramp must not slide, flex excessively or separate under load.
- Level landings: Provide space to approach straight, pause and turn safely at both ends.
- Capacity: Follow the manufacturer’s weight and use limits, including whether the ramp is intended for furniture, stairs or vehicles.
Test stability yourself before introducing the dog, but do not exceed the product’s intended use. Keep the path clear so the dog is not forced to step around furniture at the top or bottom.
Vehicle Ramps Need Their Own Plan
A ramp that works for a sofa may not work for a vehicle. Vehicle height, parking slope, door opening, bumper shape and storage space all affect fit.
Before buying, measure:
- ground-to-entry height at the door or cargo opening;
- available straight approach distance;
- door or hatch width;
- the flat surface available for the ramp’s upper attachment;
- folded dimensions and the caregiver’s safe lifting capacity.
Park on level ground for loading whenever possible. Secure the dog before opening the vehicle and prevent jumping around the ramp. A second person may be useful during training. Never allow a dog to use a hot metal or dark ramp surface that has been sitting in the sun.
If the dog cannot use a ramp confidently, ask the veterinary team or rehabilitation professional about another loading plan rather than pulling the dog upward by a collar or legs.
Ramps Versus Pet Steps
Steps use less floor space, but they still require repeated flexion, balance and coordinated limb placement. They may suit a dog that can climb comfortably but should not jump down from furniture. A ramp may be preferable when stair motion is difficult, although some dogs find a ramp unfamiliar.
Choose steps only when they are:
- broad and deep enough for the dog’s whole paw placement;
- low and consistent in rise;
- covered with non-slip material;
- fixed against the destination;
- stable under side-to-side movement.
Do not use lightweight foam steps that compress, tip or drift across the floor. Ask the veterinary or rehabilitation team to watch a video if you are unsure which movement pattern is safer.
Teach Ramp Use Without Force
Introduce the ramp while the dog is calm and the ramp is at its easiest practical slope. Place it flat on the floor first if the dog is worried about the surface. Reward looking, approaching and stepping onto it voluntarily.
Progress in short sessions:
1. Let the dog investigate the flat ramp.
2. Reward one or two controlled steps.
3. Walk straight across at a comfortable pace.
4. Raise it only slightly once the dog is relaxed.
5. Add the real destination after confident practice.
Use a harness and leash for guidance, not to drag the dog. Keep other pets and people from crowding the path. Stop if the dog freezes, scrambles, slips, jumps off the side or appears painful. Reassess slope, traction and physical ability before trying again.
Support Harnesses and Slings
Assistance gear can help a caregiver steady a dog during rising, toileting, short walks or vehicle loading. The right design depends on whether the dog needs front, rear or full-body support.
- Rear-support harness: assists the pelvis and hind limbs while the front end bears weight.
- Front-support harness: assists dogs with forelimb or shoulder limitations when specifically appropriate.
- Full-body harness: distributes support across the chest and pelvis and may offer separate handles for balanced assistance.
- Simple sling: can provide brief support but may bunch, press on the abdomen or shift if it is too narrow or poorly positioned.
Look for broad padded panels, secure adjustable straps, strong hardware and handles that let the caregiver stand upright. The device should not obstruct breathing, shoulder motion, urination or defecation. Male dogs need particular clearance around the prepuce; all dogs need protection from pressure at the groin, armpits and abdomen.
Follow the manufacturer’s fitting instructions and ask the veterinary team to confirm fit when weakness, pain, surgical recovery or neurologic disease is involved. Check the skin after each use. Redness, hair loss, swelling, moisture or rubbing means the fit or use plan needs adjustment.
A support harness is for assistance, not suspension. Lift only enough to steady or share weight, keep the dog’s spine and body level, and avoid sudden pulling. Caregivers with back, shoulder or balance problems should ask for hands-on instruction and an alternative transfer plan.
Paw Traction Products
Boots, socks and toe-grip products may help some dogs, but they are not universal solutions. Added material can change paw sensation and gait, and a loose product can twist or create a trip hazard.
For any paw-worn product:
- measure each relevant paw according to the product instructions;
- introduce one short indoor session at a time;
- confirm that the dog can place the paw normally;
- inspect for heat, moisture, pressure marks and rubbing;
- remove the product at the interval specified by the manufacturer;
- keep it clean and dry.
Do not cover an injured paw without veterinary direction, and do not use traction gear to conceal knuckling, dragging or sudden weakness. Those signs need medical evaluation.
Carts and Wheelchairs Require Professional Input
A mobility cart can improve access for selected dogs with significant neurologic or orthopedic limitations, but it is not simply a larger version of a walking harness. Fit, balance, limb position, skin protection, toileting, terrain and the dog’s front-limb capacity all matter.
AAHA guidance lists carts and wheelchairs among possible physical-assistance devices, while veterinary rehabilitation services emphasize individualized assessment. A veterinarian or qualified canine rehabilitation professional should help determine whether a cart is appropriate, choose the configuration and establish a conditioning and monitoring plan.
Monitor for rubbing, pressure injury, fatigue, paw dragging, altered breathing, fear and difficulty turning. A cart should not be used to keep an exhausted or painful dog moving beyond its safe capacity.
Set Up Safer Stairs, Doors and Outdoor Routes
Whenever possible, place essential resources on one level. If stairs remain necessary, improve lighting and traction, use a secure gate to prevent unsupervised access, and assist according to the veterinary plan. Do not rely on a dog to descend stairs backward or be guided only by the collar.
Outside, create a short, level route to the toilet area. Repair holes, unstable paving and sharp transitions. Add a gentle ramp over steps when space and safe construction allow. In wet or icy conditions, manage traction and shorten exposure.
Fence or block access to pools, open stairs, balconies and steep drops. AAHA specifically identifies stairs and pools as hazards to consider for senior pets with mobility or sensory limitations.
Keep Food, Water and Daily Care Accessible
Place water and food on non-slip flooring with room for a balanced stance. A raised or angled bowl can help some dogs but can be inappropriate for others, so ask the veterinarian when neck, spinal, swallowing or gastrointestinal concerns are present.
Keep water available in easy-to-reach locations. Use stable bowls that cannot slide into the dog’s legs. If the dog has accidents because reaching the door takes too long, add more frequent toilet opportunities and discuss the change with the veterinarian rather than restricting water.
Grooming and nail care may need a traction mat and a supported standing plan. Keep sessions short, and never force a painful limb position.
Mobility Gear Works Best with a Clinical Plan
The American College of Veterinary Surgeons describes canine osteoarthritis management as multimodal, potentially including weight control, controlled low-impact activity, rehabilitation and other veterinary treatments. Gear supports that plan; it does not replace it.
Do not design a home exercise program from social media clips. The correct movement, duration and frequency depend on diagnosis, strength, pain and neurologic status. A veterinary rehabilitation professional may use therapeutic exercise, gait work, hydrotherapy or other approaches after assessment.
Consistent, controlled activity is often more useful than occasional intense exercise, but the veterinary team should define safe limits. Report increased limping, slower recovery, new reluctance or pain after activity.
Buying Checklist for Supportive Gear
Before ordering, record:
- the dog’s current weight and relevant body measurements;
- the exact task the product must support;
- where and how often it will be used;
- surface type, destination height and available approach space;
- caregiver strength, height and balance;
- veterinary restrictions or rehabilitation goals;
- cleaning, drying and storage needs.
Then review the product for:
- clear sizing instructions and useful measurement diagrams;
- stated weight and use limits;
- stable, non-slip construction;
- padded load-bearing areas;
- adjustment range without loose trailing straps;
- clearance for normal movement and toileting;
- replaceable or washable contact surfaces;
- customer support and a realistic return policy.
Avoid products that promise to cure arthritis, reverse paralysis or eliminate the need for veterinary care. Be cautious when the same device is marketed as suitable for every size, diagnosis and activity without meaningful fitting information.
Monitor Whether the Setup Is Actually Helping
Establish a simple baseline before making changes. Time a normal rise, count slips on a common route, record how much assistance is needed and note whether the dog reaches valued activities willingly. Repeat the observation under similar conditions.
Positive signs may include:
- less hesitation before rising or crossing a room;
- fewer slips and more controlled turns;
- relaxed use of the bed or ramp;
- easier supported toilet trips;
- continued interest in family activity;
- no skin irritation or distress from gear.
Stop using a product and seek advice if it causes falls, scrambling, pressure marks, breathing restriction, panic, increased pain or a worsening gait. Needs can change, so reassess fit and function regularly.
Final Recommendation
Build senior-dog mobility support in layers. Start with veterinary assessment and a connected non-slip route. Add a firm, accessible bed where the dog wants to rest. Use a stable ramp only when its slope, width, traction and attachment match the dog and destination. Select lifting gear by the body area that needs support, confirm the fit and use it only for the intended task.
The best setup preserves safe independence without asking the dog to hide pain or work beyond current ability. Products, home layout, pain management and rehabilitation should operate as one coordinated plan.
Frequently Asked Questions
What is the first mobility product to buy for a senior dog?
Begin with the exact problem rather than a product category. Veterinary assessment comes first for a new change. At home, a connected non-slip route and a supportive low-entry bed often address common barriers before more specialized equipment is added.
Is a ramp always better than pet stairs for an older dog?
No. A ramp may reduce repeated stair motion, while compact steps may suit a dog that still climbs comfortably but should not jump. The safest choice depends on diagnosis, balance, confidence, available space, slope and the movement observed by the veterinary or rehabilitation team.
How do I choose the right size support harness?
Measure the dog exactly as the manufacturer instructs and choose the design by the area that needs support—front, rear or full body. It should use broad padded contact areas, permit normal breathing and toileting, and avoid pressure at the groin, abdomen and armpits.
Can a mobility harness be left on all day?
Only if the manufacturer specifically permits extended wear and the veterinary plan supports it. Many assistance harnesses are intended for supervised tasks. Remove and inspect as directed, keep the skin dry, and stop if redness, rubbing, swelling or distress develops.
When does a senior dog need a wheelchair?
A cart may help selected dogs with significant neurologic or orthopedic limitations, but it requires professional assessment and fitting. A veterinarian or qualified canine rehabilitation professional should evaluate diagnosis, front-limb capacity, balance, toileting, terrain, skin protection and safe conditioning before use.
Sources and References
- American Animal Hospital Association - 2023 Senior Care Guidelines: Pain Management
- American Animal Hospital Association - 2023 Senior Care Guidelines for Dogs and Cats
- American College of Veterinary Surgeons - Osteoarthritis in Dogs
- Cornell University Riney Canine Health Center - Osteoarthritis
- The Ohio State University Veterinary Medical Center - Canine Sports Medicine and Physical Rehabilitation
- American Animal Hospital Association - Canine Lifestyle and Safety Assessment
About this article
Independent pet-care guidance from the ShineePets Editorial Team for pet owners, retailers and animal-care professionals.
ShineePets is a commercial B2B pet-supply sourcing brand. Read our editorial standards and commercial disclosure.