Product Sourcing
How to Review Pet Product Samples Before Bulk Orders
Quick answer
A practical framework for checking pet product samples, documenting defects, approving a golden sample and connecting approval to bulk inspection.
By ShineePets Editorial Team · Published · Updated
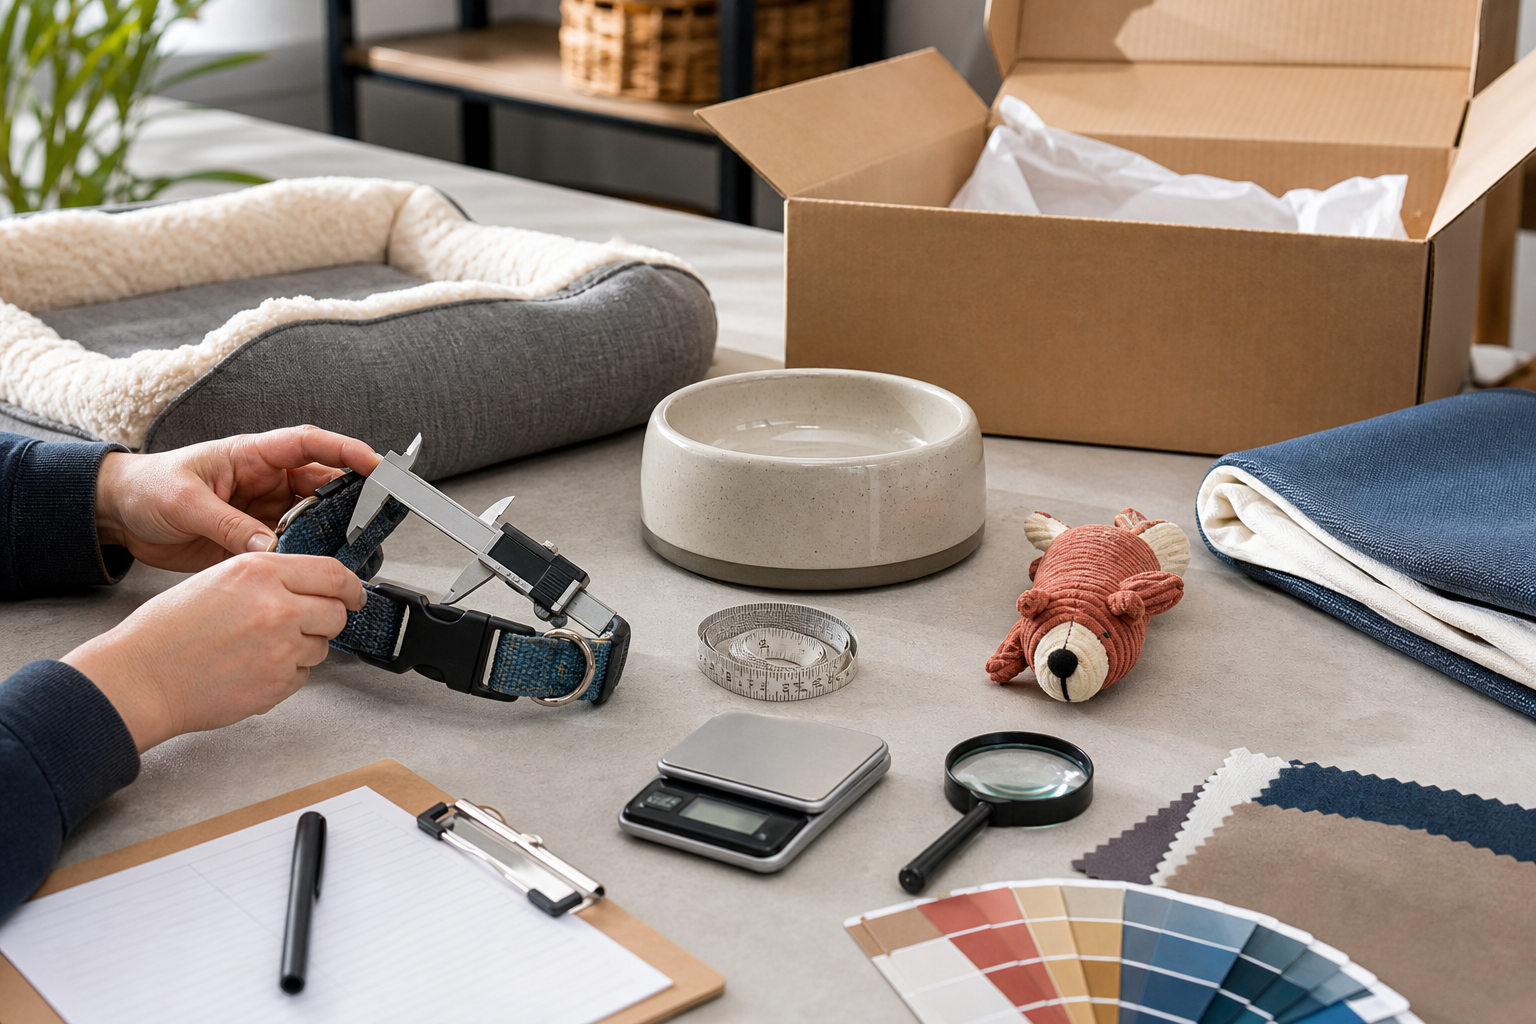
A product sample can look impressive and still fail in bulk production. The color may be right while the material is wrong. One buckle may work smoothly while the production version uses a different component. A carton may arrive intact by courier but collapse when stacked for ocean freight.
A useful sample review therefore asks two questions:
1. Is this specific sample acceptable?
2. Can the supplier reproduce the approved result consistently at production scale?
This guide provides a practical review system for pet beds, bowls, collars, toys, carriers, grooming tools and other non-food pet supplies. Food, treats, supplements, electrical products and regulated medical items require additional specialist review.
Quick recommendation: Never approve a sample from memory or appearance alone. Review it against a written specification, record every deviation, and keep one signed approval sample as the physical reference for production and inspection.
Why Sample Approval Is a Production Decision
A pre-production sample is not only a sales demonstration. Once approved, it can become the reference for materials, dimensions, workmanship, colors, packaging and performance.
Weak approval language creates expensive ambiguity. Notes such as "quality looks good" or "make it like this" do not tell a production team which characteristics are mandatory.
A useful approval record should state:
- the supplier and factory;
- product name and buyer item number;
- sample version and date received;
- intended sales market;
- specification revision;
- required materials and components;
- measured results;
- defects and corrections;
- test reports reviewed;
- packaging version;
- final decision and approver.
Step 1: Freeze the Review Specification Before Testing
Reviewing without an agreed specification turns the process into opinion. Before the sample arrives, create a product specification that can be measured.
Include the following where relevant:
- overall dimensions and tolerances;
- net weight or fill weight;
- material composition;
- fabric weight, density or thickness;
- coating, finish and color reference;
- hardware material and dimensions;
- seam type and stitch density;
- load, cycle or stability requirements;
- odor and appearance expectations;
- assembly instructions;
- warning labels and traceability marks;
- retail packaging and master-carton requirements;
- required legal or laboratory documentation.
Do not use a competitor's item as the only specification. A benchmark can show the target experience, but the supplier still needs a written, reproducible definition.
For a broader supplier review before sampling, see How to Evaluate a Pet Supplies Manufacturer.
Step 2: Confirm Sample Identity and Traceability
Start by making sure you know what you received. Attach a temporary sample label if the supplier did not provide one.
Record:
- supplier name;
- factory name if different;
- item number;
- sample revision;
- production method;
- material batch or lot when available;
- date produced and shipped;
- whether the sample was handmade, taken from normal production or made on production tooling;
- all differences from the proposed bulk item.
A handmade development sample may be useful for shape and concept approval, but it should not be treated as proof of normal production capability. Ask when production tooling, machinery and actual bulk materials will be used.
Photograph the unopened parcel, shipping label, inner packing, product and each identified defect. Use a scale or ruler in close-up photographs when size matters.
Step 3: Review Documents Before Appearance
A good-looking sample cannot validate an unsupported material or compliance claim.
Request documents appropriate to the product and destination market, such as:
- bill of materials;
- material declarations;
- technical data sheets;
- test reports from competent laboratories;
- coating or color specifications;
- care instructions;
- warning and labeling artwork;
- packaging material details;
- supplier's internal inspection record;
- traceability information.
Check the document details, not only the file name. Confirm that the model, material, colors, components, age or size range and tested standard match the actual item. Check the laboratory, report number, issue date and whether the report covers the same construction.
Do not describe a product as certified merely because a component supplier sent a certificate. Product-level claims need evidence that applies to the finished item and relevant market.
Step 4: Inspect Workmanship Systematically
Use bright neutral lighting and inspect every side. Handle removable covers, straps, fasteners, zippers, seams and assembled parts.
General workmanship checks
Look for:
- sharp edges, burrs or exposed wire;
- loose threads and skipped stitches;
- open seams or weak stress points;
- glue marks or excessive adhesive;
- cracks, chips, dents or deformation;
- unstable bases;
- uneven coating or color;
- strong or unexpected odor;
- loose hardware;
- rough surfaces that contact the pet;
- trapped debris or contamination;
- incorrect labels or missing instructions.
Inspect at least two or three samples when possible. One unusually good unit may not represent normal output, while a single isolated cosmetic flaw may not show the real process capability.
Classify defects before negotiating
Create buyer-specific definitions for three defect levels:
- Critical defect: A condition that may create an unacceptable safety or legal risk, or make the item unsafe for intended use.
- Major defect: A problem likely to cause product failure, return, loss of function or clear mismatch with the approved specification.
- Minor defect: A limited appearance or workmanship issue that does not materially affect intended use.
The classification must reflect the actual product, market and foreseeable use. Do not copy generic examples into a purchase contract without adapting them.
Step 5: Measure, Weigh and Compare
Visual judgment is not enough for size, fit or consistency.
Prepare calibrated or suitable tools for the task:
- ruler and measuring tape;
- digital caliper;
- scale;
- thickness gauge;
- color standard or approved swatch;
- angle gauge or level when stability matters;
- timer or cycle counter;
- camera and controlled lighting.
Measure the same points on every sample. For a pet bed, define whether dimensions include the raised bolster. For a collar, specify the usable adjustment range rather than only total length. For a bowl, record capacity and base diameter in addition to external dimensions.
Compare results with the specification and list each deviation numerically. "Slightly small" is not actionable; "base diameter 176 mm versus 185 +/- 3 mm" is.
Step 6: Test Function Under Foreseeable Use
A functional review should reproduce normal and reasonably foreseeable use without creating unsafe informal experiments.
Collars, harnesses and leashes
Check:
- adjustment range;
- buckle engagement and release;
- strap slippage;
- stitching at load points;
- D-ring and swivel alignment;
- edge comfort;
- hardware corrosion or coating damage;
- repeated opening and closing.
Load-bearing claims should use an agreed test method and suitable equipment. A person pulling by hand is not a controlled strength test.
Plush, rope and interactive toys
Check:
- seam security;
- exposed filling after repeated compression;
- detachable decorations;
- loose fibers;
- squeaker or insert containment;
- size suitability for the intended animal;
- damage after controlled play simulation.
No toy is indestructible. Instructions and warnings should reflect supervision, size selection and replacement when damaged. See Pet Toy Safety: Materials, Size and Supervision.
Bowls and feeders
Check:
- stability on common flooring;
- tipping and sliding;
- sharp or rough rims;
- coating condition;
- actual volume;
- cleaning access;
- detachable parts;
- food-contact documentation where required.
Beds and textile products
Check:
- seam strength and zipper shielding;
- removable-cover fit;
- fill distribution;
- recovery after compression;
- dimensions before and after care testing;
- color transfer;
- drying time and odor;
- care-label accuracy.
Carriers, crates and enclosures
Check:
- door and latch operation;
- ventilation openings;
- assembly fit;
- structural stability;
- pinch and escape points;
- base support;
- handle attachment;
- cleaning access.
Any test involving live animals should be low risk, supervised and conducted only after the product has passed the relevant physical and safety review. An animal trial is not a substitute for laboratory or engineering testing.
Step 7: Test Cleaning and Care Claims
Pet products are frequently exposed to saliva, hair, food, water, dirt and cleaning agents. A sample that looks good when new may fail after normal care.
Follow the proposed care instructions exactly. Record:
- cleaning method;
- water temperature;
- detergent;
- cycle settings;
- drying method;
- time;
- dimensions before and after;
- color or texture change;
- delamination, cracking or corrosion;
- odor after drying;
- whether the item can be reassembled correctly.
If the product cannot pass the care method printed on its own label, either the product or the instruction needs revision.
Step 8: Review Packaging as Part of the Product
Packaging affects damage rates, storage, fulfillment cost and customer experience.
Review the retail pack for:
- product protection;
- correct item and color identification;
- barcode quality and position;
- country-of-origin and responsible-party information where required;
- warnings and instructions;
- suffocation warnings for plastic bags where applicable;
- pack dimensions and weight;
- ease of opening without damaging the product;
- excess empty space or material.
Review the master carton for:
- carton dimensions and gross weight;
- quantity per carton;
- stacking orientation;
- edge and corner protection;
- moisture protection;
- shipping marks;
- carton strength specification;
- internal movement.
Use a transport-test plan appropriate to the route, package and risk. A single hand drop in an office is not equivalent to a controlled packaging test.
Step 9: Separate Product Quality from Compliance
Sample inspection and regulatory compliance support each other, but they are not the same.
For non-food consumer products sold in the European Union, the General Product Safety Regulation requires businesses to consider characteristics such as composition, packaging, assembly and maintenance instructions, warnings and reasonably foreseeable use. Product-specific EU rules may also apply.
For pet food in the United States, the FDA requires animal food to be safe, produced under sanitary conditions, free from harmful substances and truthfully labeled. Importers and manufacturers may have additional preventive-control and supplier-verification duties.
Before approving a sample:
- identify the destination market;
- build a product-specific compliance checklist;
- confirm which rules and standards apply;
- review current test evidence;
- verify labels and traceability;
- search relevant recall and Safety Gate databases;
- assign responsibility for any remaining tests.
Do not rely on a supplier statement such as "meets all standards" without identifying the actual standards and evidence.
Step 10: Use a Weighted Review Scorecard
A scorecard keeps teams consistent, but safety and legal requirements should remain pass-or-fail gates rather than points that can be offset by attractive design.
A practical scoring structure might include:
| Review area | Suggested weight |
| --- | ---: |
| Specification and dimensions | 20% |
| Workmanship | 20% |
| Function and durability | 25% |
| Cleaning and maintenance | 10% |
| Packaging and labeling | 15% |
| Documentation and traceability | 10% |
Add separate mandatory gates for:
- unacceptable safety hazards;
- prohibited or restricted materials;
- missing required warnings;
- failed mandatory tests;
- false or unsupported claims;
- inability to trace the model or material.
Set the approval threshold before reviewing the sample. Do not lower it simply because a launch date is close.
Step 11: Make One of Four Clear Decisions
Avoid a vague "approved with comments" email. Use one controlled status:
1. Rejected: The concept, construction or risk is unacceptable.
2. Revise and resubmit: Changes are required and a new sample must be reviewed.
3. Conditionally approved: Limited corrections may be verified by documented evidence before production, but the exact conditions and owner are recorded.
4. Approved for production: The sample and documentation meet the agreed requirements.
If changes affect material, dimensions, safety, fit, performance, packaging or claims, request a revised sample. A photograph alone is rarely enough for a material or functional change.
Step 12: Create and Protect the Approval Sample
The approved physical sample is often called a golden sample, sealed sample or reference sample.
Mark it with:
- product and buyer item number;
- sample revision;
- approval date;
- approver;
- signature or tamper-evident label;
- specification revision;
- approved color;
- attached exception list, if any.
Photograph all views and store the sample where it will not be used, damaged or exposed to sunlight and moisture. The buyer and supplier should each retain an equivalent approved reference when practical.
A golden sample does not replace the specification. Physical references can age, fade or be interpreted differently, so keep the signed specification, measurements, artwork and photos together.
Step 13: Connect Approval to Bulk-Order Quality Control
A sample review controls the target. Production inspection checks whether the lot matches that target.
Before production, confirm:
- final purchase order and specification revision;
- approved bill of materials;
- approved sample location;
- packaging artwork;
- critical and major defect definitions;
- required inspections and tests;
- change-control rule;
- corrective-action process.
During production, consider first-article confirmation and in-line inspection for high-risk or new products. Before shipment, use a statistically appropriate sampling plan and the approved sample.
ISO 2859-1:2026 defines AQL-indexed acceptance sampling schemes for lot-by-lot inspection. An AQL plan helps determine how many units to inspect and the acceptance or rejection thresholds, but the buyer must still define lot size, inspection level, defect classes and risk controls correctly.
Important: AQL is not permission to ship known unsafe products. Critical safety issues require separate controls and should not be averaged into an acceptable defect percentage.
For the wider private-label workflow, read Private Label Pet Products: A Retailer's Starting Guide.
Common Sample-Review Mistakes
Avoid these frequent errors:
- reviewing before the specification is frozen;
- approving from photographs only;
- testing only one hand-selected sample;
- accepting a handmade sample as proof of mass production;
- ignoring packaging;
- using uncalibrated tools for tight tolerances;
- approving colors under inconsistent lighting;
- changing materials after approval without resampling;
- treating old or unrelated test reports as valid;
- assuming a passed sample guarantees every production unit;
- failing to retain an approved reference;
- letting schedule pressure override a safety gate.
A Practical Sample Review Checklist
Before approving a bulk order, confirm:
- [ ] Product identity and revision are recorded.
- [ ] Intended market and user are defined.
- [ ] Specification and tolerances are approved.
- [ ] Materials and components match the declaration.
- [ ] Required reports cover the actual model.
- [ ] Dimensions and weight are measured.
- [ ] Workmanship is checked under good lighting.
- [ ] Critical, major and minor defects are defined.
- [ ] Functional tests use an agreed method.
- [ ] Cleaning and care claims are verified.
- [ ] Packaging and labels are reviewed.
- [ ] Recall and safety databases are checked.
- [ ] Deviations have owners and deadlines.
- [ ] The decision is documented clearly.
- [ ] Approval samples are sealed and stored.
- [ ] Bulk inspection requirements are included in the order.
Final Takeaway
A strong sample review converts expectations into evidence. It combines a measurable specification, controlled functional checks, risk-based compliance review, packaging verification and a clear decision record.
Most importantly, it does not stop when the sample is approved. The approved sample, written specification and defect criteria must travel into production, in-line control and pre-shipment inspection. That continuity is what turns a promising prototype into a repeatable bulk order.
Discuss Your Sourcing Project with Our B2B Team
Planning a pet-product range, private-label project, or supplier brief? Share your target market, product category, MOQ expectations, sample requirements, and timeline with the ShineePets B2B team through our 24/7 WhatsApp Business contact page.
Explore our OEM and private-label support, dog product sourcing options, and cat product sourcing options before preparing your brief.
Frequently Asked Questions
How many samples should a buyer review before placing a bulk order?
Review more than one unit whenever possible, especially for a new supplier or process. The exact number should reflect product risk, cost and variation. A single sales sample cannot demonstrate production consistency.
What is a golden sample?
A golden sample is the signed and controlled physical reference approved for production. It should be linked to the final specification, photos, measurements, artwork and any accepted exceptions, with equivalent references retained by buyer and supplier when practical.
Does an approved sample guarantee the bulk order will pass inspection?
No. Sample approval defines the target, while bulk inspection checks whether production matches it. Materials, tooling, operators and process conditions can change, so in-line and pre-shipment controls are still necessary.
Should AQL be used during the initial sample review?
AQL is designed for acceptance sampling of production lots, not for deciding whether one development sample is good enough. Use the sample review to define requirements and defects, then apply an appropriate ISO 2859-1:2026 sampling plan to bulk inspection.
Which sample defects should automatically block approval?
Unacceptable safety or legal risks, prohibited materials, failed mandatory tests, missing required warnings, unsupported claims and traceability failures should be treated as approval gates. Exact criteria must be defined for the product and destination market.
Sources and References
- ISO 2859-1:2026 Sampling Procedures for Inspection by Attributes
- ISO 28590:2017 Introduction to the ISO 2859 Series
- European Commission: General Product Safety
- European Commission Access2Markets: Trade Regime and General Product Safety
- U.S. FDA: Pet Food Regulation
- U.S. FDA: How Do I Start an Animal Food Business?
- U.S. CPSC: Buying and Selling Products Online
About this article
Evidence-informed sourcing and product quality guidance from the ShineePets Editorial Team.
ShineePets is a commercial B2B pet-supply sourcing brand. Read our editorial standards and commercial disclosure.